Tuesday, April 30, 2019

Two Knives in Two Hours!

No kidding!  I really did make both these knives in just under 2 hours today.  I started from round bar and ended with what you see here.


Handles are made from local chokecherry limbs that were cut off the trees a couple of years ago.  I wanted to do semi-medieval knives with these, so the tang slots are burned in and the blades are held in with pitch, which actually holds them very well.  

The second knife is a little odd, in that the blade sort of cocks forward more than I had intended.  It will still make a good tool, but isn't quite the look I was going for.  The other I think I will make a sheath for.  It is a good knife and feels really comfortable in the hand.  

I took video of the whole process, except the hardening, when the battery ran out and I didn't notice, but you don't want to slog through two hours of me hitting steel.  Here's the condensed version with some narration: Two Knives, Two Hours.  

Happy Dog, Happy Child

After picking the youngest up from school today, we drove down to Tanana Lakes to walk the dog.  The water is still mostly frozen over, of course, but both the dog and little kid had a great time just running and playing.

Every time the dog ran past, my little one would laugh out loud.  She's in First Grade and takes such wonderful delight in all sorts of things most of us just ignore.

If everyone in the world could be as honestly joyful about a happy dog as my little girl, we'd be living in a much much better world.  I'm going to try to remember that and try to enjoy such things a little more.


Sunday, April 28, 2019

A Basic Bead Making Setup

We have a dear friend who wants to make beads.  She's been over several times and melted glass at our house.  She has been out of town for a few days and her husband asked if we would help him get things set up so she would have a bead making station when she gets home.

I realized this is a good opportunity to share the basic setup that can be used to get almost anyone started with this wonderful craft.

First, here's the workbench, sized for the corner of the garage where she will be making her beads:


You can zoom in for a closer look if you like, but I'm going to highlight a few vital bits below.

1- the mandrels in a simple block of wood.  I drill about 30 holes in a length of 2x4 and put the mandrels in there.  We use 3/32" stainless steel TIG rod, cut to 12" long.  You can buy bead mandrels made of the same stuff for significantly more money.  We gave her 15 of our mandrels to get started.  She can buy more rods to fill up the holder.  

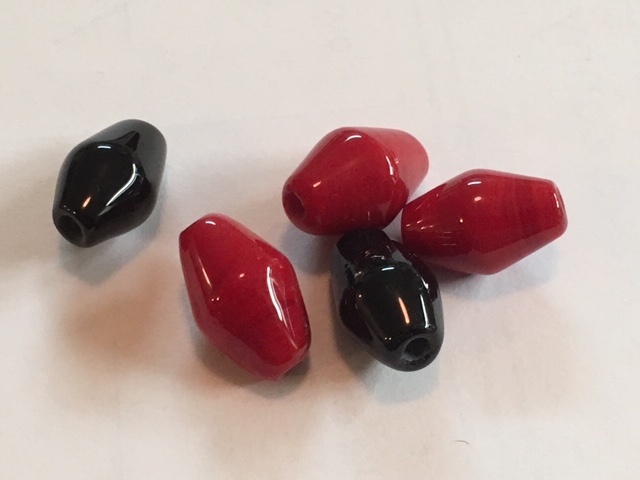
The grey/white coating on the ends is bead release, which is a weak ceramic that will make it possible to remove the beads.  If you buy handmade beads, they often have a thin layer of this stuff inside the holes (and if you look at my Day 9 beads, I hadn't cleaned  them out, so you can see an example in my pictures as well).  If you just stick the glass onto the metal rods, it will never come off.  Put some clay on there, the glass sticks to the clay, but weakly.  The clay sticks to the mandrel, but weakly.  So you can remove the glass from the mandrel once it is all cooled to room temperature.  Which brings us to...

2- a place to cool the beads.  In this case, a pretty flower pot filled with vermiculite.  The other common option is to use two layers of ceramic fiber blanket material.  Either way, the idea is to insulate the bead so it cools slowly.  See, glass will develop a lot of stress if it changes temperature too quickly.  Ever pour hot water from pasta into a sink and shatter a drinking glass?  It works the other way, too.  Cooling it too quickly will also cause stresses in glass that result in broken beads.  But if you put them into the vermiculite (or ceramic blanket) at about 1000 degrees Fahrenheit, allowing them to slow-cool over several hours, there is a lot less stress developed.  Ideally, you would still put them through a full annealing cycle in a controlled kiln, but if the beads are not really asymmetrical in shape, the cooling should be fairly even and the beads will still be pretty strong.  

When she has gotten to the point where she absolutely has to do some weird beads (for me it was fish), she may want to invest in a kiln that allows for precise control of her cooling.  For now, vermiculite will be a very adequate way to cool those beads.  

3- the torch and the glass.  Gotta have glass to melt and gotta have a way to melt it!  We use a Hot Head torch for all our beads.  There are a lot of bead makers who scoff at the humble Hot Head because it is a beginner's torch.  It uses propane or MAPP (think propane on steroids).  Most pros use a propane/oxygen setup that is a lot hotter and a bit cleaner burning.  But if you are just getting started, do you really want to invest in a fancy torch, two regulators, and two different tanks of gas?  We use a common barbecue tank and a hose to connect to the torch, as shown in the main picture.  The day we can't do what we want to do because the torch is the limiting factor, not our skills, we will look at investing in a Minor Bench Burner or similar.  For now, although a bit slower, we are able to make everything we've wanted to make using this torch head and have no reason to supercharge our setup for now.

The glass is Italian glass from the Effetre company.  We have used other brands and like them well (I wish my source for Lauscha glass was still around, but I haven't seen that brand since I started making beads again after several years hiatus), but the value for dollar of the Effetre makes it a favorite for us.  I caution you not to make the mistake of using Indian-made glass as a beginner.  There are glass colors from India that can be worth using just because you can't get them anywhere else, but our experience is that it is brittle in the rod form and tends to shatter easily in the flame.  When you have enough experience to put up with the challenges, by all means play with it!  But for a raw beginner, it is just discouraging.

4- storage of supplies.  Here, a jar of bead release for the mandrels and a baggie of millefiori.  When her husband's order of glass and tools comes in, she can store the things she wants to have accessible, but not on the main bench down here on the shelf.  A reference book would be a great thing to keep out in the shop.  (I love Cindy Jenkins' book Making Glass Beads - I get no money if you buy via this link, but wanted to send you to it if you are interested.)  

There are many little tools that any bead maker ends up collecting.  I'll detail some in future posts.  For now, this is a look at the basic setup that you need to make glass beads.  Not shown here is a set of safety glasses (because even the lovely Italian glass can and does break with little glass shrapnel sometimes), but the husband had purchased a very nice set, they just were not on the bench when I took the photo.

Safety Note:

Ventilation is vital!  What you don't see in this picture is that if you took a single step to the right from where you would stand when making beads, you'd be outside.  The entire garage door rolls up beside the work bench.  There is certainly carbon dioxide from that torch and there may be carbon monoxide as well.  The easiest way to protect yourself is to have so much open air that it won't be a worry.  

Seriously, this matters.  I knew a bead maker who had her indoor studio vented with active fan to the outside.  Unfortunately, she had her air intake right next to the outlet from the vent above the torch.  So she was pulling back in exactly what she had worked so hard to vent out.  She got badly sick from CO poisoning and had to quit making beads permanently.  And she made some fantastic beads before this happened.  

I once met someone who claimed she just made beads in her living room.  I strongly cautioned her about what can happen with poor ventilation.  She said she'd open her window.  I sure hope she never suffered any ill effects, but I would not think of working with an open torch flame and not having essentially a full wall open to outside air.  If it is too cold to make beads, I'd rather miss out on the fun than mess myself up.  CO exposure is no joke and can kill you.  Even a moderate exposure can make you very sick and cause permanent damage to your brain.  

If you want to make beads, I encourage you to do so.  If you live in my area, I will help you get started.  But if you want to do it without having a way to absolutely guarantee good fresh air, just make beads from polymer clay, please.  Don't use glass.  Your life is worth so much more than some glass beads.  


Day 10

Zigzag barrel beads.  I used Ivory color instead of white.  Not having an original in front of me, I can't say whether the stark white or the off-white is more accurate, but I find the slightly off-white to be warmer and more pleasant to my eye for these beads.


I've made versions of these before, so nothing new to me in skills, but they still require focus and concentration to get them right.  If you look at the Hon necklace featured a few posts back, you will see a few beads similar to these, but with black base beads.  The technique is the same, regardless of the color scheme.  

See the one standing on end?  This is to illustrate the importance of getting the hole right.  If you moosh the glass on when making the bead, it spreads and makes a sharp edge.  This is more delicate than the puckered holes and also will cut a string, where the puckered hole won't.  

I view the smooth dimple as a mark of skill and look for it on any bead I pick up.  I also don't sell or even give away any bead I make that has a sharp edge to the hole.  There are diamond-coated reamers made for removing the sharp edges.  But they always look like they were tool-worked.  I want my beads to show that they are made right the first time.  

If you are ever in the market for glass beads, look for little details like this.  It tells you that the maker actually cares about the beads and isn't just cranking them out as fast as possible to make a few bucks.   

Day 7 Do-Over

I wasn't happy with the results of my first effort at Day 7's beads.  So I did them again.  Since the point of this exercise is to recover and improve my bead making skills, I think it is worth doing them to my satisfaction.

A little more color variation, too.


And if you ever make a mistake with the stringer, you can feel free to do what I do.  Grab a rake (pointed tool for manipulating the surface of the bead) and turning it into a random swirl pattern.  Not at all historical, as far as I know, but still a pleasing result and it salvages a bead for use in modern jewelry.


Throwing Knives

As a rule, there are only two kinds of throwing knives.  There are the knives that are tough enough to take the abuse and there are the knives that are in pieces.  Purpose-made throwing knives usually fall into the former category, of course.  Almost all others fall into the latter.

But some knives that are not made with the intent to throw them are still tough enough to take the abuse.  That's the reason it is worth really learning the limits of the materials you work with.


At some future time, I may post something about how I test my blades so I know what sort of performance potential they have.  For now, this is an illustration of what sort of performance I expect from the steel I use and the heat-treat I give it.  In addition to this level of durability, I expect this blade to hold an edge better than most knives you can buy in a store.  


The purpose-made throwing spikes are made of the same steel as the .50 caliber knife.  I've been throwing those spikes for a couple of years now.  Today, yesterday's fun project joined them.  The guard makes it a little heavy, so it flies a little lower.  It sticks deeply in the wood.

Good times.  I love summer.

Now if only I could get over the last of this congestion and feel healthy again...

A Bead

Not all the beads I make are historical.  I was working on some for the 21 Day Bead Boot Camp a couple of weeks ago and my youngest asked me to make a bead for her.

Just today I cleaned out the hole and put it on a ribbon for her.  She likes it.


Saturday, April 27, 2019

A Forge Project

My buddy Tylor comes over sometimes to do some forge work.  Today he brought a friend of his, Johnathan.  And a "special" project.

But first, a safety reminder:


Here's Johnathan, swinging a hammer for his first forged blade, though he's made knives before.


Tylor taking his turn at the anvil:


Here's a look into the forge.  I'm heating up some steel for guards.  Part of the fun of this project is that we are sort of making up the process as we go along.


A hot-punched hole is the least wasteful way to make a hole.  That little tiny round thing to the left of the rough-shaped guard is the only metal removed from the hole.


Tylor's project involved the use of some spent .50 caliber shells he'd picked up recently.  The marker in the first picture is for size comparison.

This is my knife.


Johnathan's:


Tylor's:


His shaping is really good on this blade.  For as few knives as he's made, he has really learned how to get the shape he wants out of the steel.

This isn't really the most practical handle material, but it is a very unusual and extremely fun way to put a handle on a knife.

I'm recovering from a really draining cold and it is the end of the semester, so this project really wiped me out.  Still, it was a great way to get a break from the studying for finals that I really should be doing instead of having fun.

More to come as I get a chance to make more things.

Wednesday, April 17, 2019

SNOW! Argh!

I took the dog out this morning and look what I found!  On April 17th!  I mean, I know this is Alaska, but come on!  This was all gone and we were getting 45 and 50 degree days!


FOUR INCHES!

And is anything as sad as a knife throwing target that looks like this?


Tuesday, April 16, 2019

Lunchtime Spoon Carving

When I am getting stressed out at school, I will bring along my bucket of knives and wood and I'll spend time between classes carving spoons.  This one is a little funky because the grain in the wood was not straight.  I tend to follow the grain when carving a spoon, letting it tell me, at least in part, what sort of spoon it is meant to be.  

This post is going to be picture-heavy because I'm indulging myself and describing the process I follow with these spoons.

 I like to start by shaping the sides of the handle.  I also rough in the angle on the back of the bowl.  Shown here is one of my two favorite carving knives.

 Side view of the same stage of carving to show how much I take off the end for establishing the angle of the bowl.

 Here's my smaller hook knife.  I use it here to establish the "crank" of the spoon.  That's the common term for the angle between the handle and the bowl.  If you think about trying to scoop soup out of a pot with a spoon that has the bowl directly in line with the handle, you know why the crank is there.

 Same stage of work, just showing the top where I carved in the crank.

 The bowl is roughly hollowed now.  I've also started to work down the handle.

 Side view.  The crank is pretty obvious, here.

 Finished spoon!
 From the side.

And from the back.  This one promises to be a pleasant tool for eating.  I like the sweeping curve of the handle.  Not quite as practical as my usual medieval spoons, but it will fit into a small container of yogurt much better than the big paddle spoons I like so well.

By the way, all those wood chips on the floor are not left behind.  I carry a small whisk and dustpan so I can sweep up after myself.  

Monday, April 15, 2019

Seed Beads 

This is a simple trick that I'm surprised I haven't seen mentioned more.  I got the idea once from seeing a photo of beads made in India, where about 5 fish-shaped beads were on one mandrel.  No mention of this was made in the text of the article, just a photo that happened to show several mandrels on the table with beads still on them.  

Getting the mandrel heated up can take as long as making the bead with these basic seeds, but by putting several on one mandrel, it is possible to match them pretty closely in size, practice the basic technique several times in a row, and make more bead with less space taken up in the annealing kiln.  

Nothing fancy. Just basic beads.  But looking at our old project with the Hon necklace replica has me thinking more about how nice a basic seed bead can be without anything else adorning it.  And that has me wanting to make more of the just plain and simple beads like these.

Sunday, April 14, 2019

Medieval Spoons

I enjoy carving spoons and I am generally game to try almost any pattern, within reason.  But I keep coming back to this one.  I mostly carve them from Alaska Birch.  I never cut down a tree to get spoon wood.  No need.  I look for trees that have been cut to clear land or scraps from wood cut for firewood.  If a tree falls across a road, I will happily collect some spoon wood.  

These were used all over Europe for at least 500 years.  There's one very similar to this pattern that was found on the Mary Rose.  They show up in all sorts of places and times. They don't work all that well for modern eating styles, which is really interesting to me.  It is evidence that people actually used their eating utensils differently 500 to 1000 years ago than they do today.  

Next to a modern teaspoon, you can see how large the bowl of one of these spoons is! In this picture, you can also see that I like to leave the surface of my spoons faceted from the knives I use to carve them.  A sharp knife leaves a smoother surface than sandpaper, even if it looks faceted from the tool marks.  

A concern I've heard expressed a couple of times is that eating with a wooden spoon will leave splinters in the mouth.  I don't understand this, as the same person doesn't worry about a wooden floor leaving splinters in the feet or a wooden chair leaving splinters in the backside.  But something about a wooden spoon just seems to worry some people.  

I have a lot of these spoons (and a few other styles) in a nice clay pot on my counter.  I am sure I don't need to have so many for the wooden spoon needs of one family, but I enjoy making them and I enjoy using them, so I keep them where they can be seen.  

I don't sell my spoons.  But I do sometimes give them away.  That is just how I prefer to do it.  

There's something truly homey about a wooden spoon.  In another post, I will eventually show some of my cooking spoons.  


Saturday, April 13, 2019

Day Nine - More Stringer

Today is a simpler application of stringers, but that doesn't really make it easier.


I used much thinner stringer for these beads than for the zigzags.  The idea is to have a thin, delicate line of white on the blue base bead.  I was aiming for three lines on each.  Clearly I would benefit from more time spent with stringer work.  The effect is actually more pleasing in person than it is in the photo, but my precision isn't where I want it to be.  Yet.

(Parenthetical interjection about the word "yet": I read years ago that it is useful to rephrase any negative comments by adding that one word.  It means that you are open to improving a situation.  As in "I can't play Flight of the Bumblebee on the bagpipes," is very different from "I can't play Flight of the Bumblebee on the bagpipes yet."  One is a simple statement of the limitations of my abilities, the other is a statement of my goals.)

I can't decide which of the two blue colors used here I actually like better.  The brighter one is more eye-catching, but the subdued transparent blue seems more elegant and understated, what with the grey cast to it (this comes from working a little too close to the dirty part of the flame when making the bead - distressingly easy to do and certain colors show the crud more than others - however, there are serendipitous moments like this one where the result is more pleasant because of the dirty flame and I have used that in the past for deliberate effect).  Also, since I have not cleaned out the bead release from inside the holes of these beads, the light doesn't show through to quite the same degree.  

This is as far as I've manage to get on this 21 day challenge so far.  I will update more as time and opportunity make possible.  The next bead to tackle is a barrel-shaped zigzag.  I really like how this series of beads builds on skills worked on in previous beads.  I intend to spend some time just practicing stringer work before I do the challenge beads.  I may or may not share the results of said practice.  

I'm only about 3 weeks from the end of the semester (back to school in middle age and with two kids still at home - of course I picked one of the more rigorous degrees programs and this semester was 17 credits of hard work), so there might not be much time to do anything creative.  If I don't update for a little while, it is because I'm busy, not because the blog died.

Old Work

This is a bit about a project my wife and I did back when we were active in the SCA.  This is at least 17 years old, though I really don't recall exactly when we made it.  Back then, there was very little available online.  Our information all came from books.  One of the most famous strings of beads found in a Viking context was from the Hon Hoard.  Most Viking hoards were piles of several pounds of silver jewelry and coins.  With a few other bits of valuable stuff mixed in, perhaps.  The Hon hoard was almost exclusively gold.  Except for this necklace:

We have seen this necklace assembled several different ways in several different books.  Sometimes with all the gold bits (taken from book mounts and at least one coin) and sometimes without.

Our own recreation was made without the gold.  We didn't have the skills or equipment at the time to do the metal work.


 The Hon necklace has several of these little dangles holding from one to several beads on wire loops.  I've seen that replicated elsewhere, but it doesn't appear to be common with Viking bead strings.  Since information was scanty back then, the impression was that this was part of every Viking necklace.


Notice how simple, plain white seed beads are quite a bit more showy when displayed that way?  About the most complex beads in this necklace are the zigzags shown here.  Told you we'd been at it for a while!


Many of the beads in the Hon necklace (and of course our recreation) are really just seed beads.  A glass bead is inherently lovely, even as a small seed.  We forget that sometimes when we are trying to make fancy things.  While most of the individual beads online from Viking finds are the fancy ones, I am pretty sure the vast majority of the beads made and worn a thousand years ago were simple seeds.

And here's the finished string of beads.  We made this as a gift for a friend in the SCA who actually understood the work and effort represented here.  She wore it for years with her SCA garb, hung between two brooches.  Nowadays, that's understood to be the way Viking women wore their beads, but it was still sort of a new thing to think of necklaces that way 20 years ago.  I sometimes wonder if we will have a completely different understanding of Viking clothing in another 20 years.  Part of the fun the SCA is to experiment with the clothing and see how practical a particular reconstruction actually is.

Our friend made a very amusing comment when we gave this necklace to her.  "Now I just need to bury it in the ground for a thousand years and it will look perfect!"

Other people will use etching creams to artificially age their beads and make them look more like the examples in the museums.  

But there is a fundamental flaw in this thinking.  When the Hon necklace was new, it was as shiny and sparkling as our version.  If a person wants to dress as an authentic Viking woman, she would be better off with a string of sparkling simple seed beads than with a string of fancy beads that are etched to look faux-old.  

Day Eight - Segmented Beads

I've made these before.  They are knacky, but not terribly difficult.  Doing them well requires good heat control and a good sense of proportion.  It is really easy to find myself making a bead of 3.5 segments instead of 4.  Not what I want.  

I actually bought this yellow because I wanted to make these beads.  It is wonderful to find that modern colors are available that so closely match the colors of the ancient beads.  

There are examples of this bead type that have gold foil inside clear glass.  I may attempt this one day with silver foil.  I've tried it in the past, but don't have any examples around anymore.  If I do it, I'll surely put something up here about it.

I speculate that the reason these segmented beads were invented is to make it faster to fill a necklace.  As you can see, they look like 4 seed beads joined together.  Some are 2 segments, others 3, but I don't recall seeing any with more than 4.  Don't take that as gospel, though.  I'm not a bead historian, just someone who enjoys historical beads.  

Day Seven

From the complexity of the fancy eye beads, we now move to something more visually simple.  Simple zigzags.  There are more complex zigzags coming later in the project, but these are a good place to start.


The challenge for today specifies red-brown for the base bead, but there are extant photos of the simple zigzag beads on black as well.  I used red because I don't have any red-brown glass at the moment.  I'd argue that it looks close enough.

The zigzag is applied with stringer, which is very thin glass.  This was a bit thinner than the lead in a wooden pencil.  It can be pulled as fine as a human hair, but I've found it very hard to control when it is that thin.  

Stringer work is a different world from the dots that make eye beads.  Here, we are applying very thin glass rods to the surface of a hot glass bead.  Sounds easy, but it is tricky because there's a torch flame melting the stringer as it is applied, sometimes melting right through the rod if I'm not really careful with how I work.  When my wife and I were first learning to make glass beads, zigzags were a skill we worked hard to learn.  It isn't complex, but it is precise.  Sometimes the precision makes it a lot harder than you might expect.

I'm not entirely satisfied with the resulting beads today.  My zigzags are wider than on the example beads.  They are also wider than historical examples I'm trying to emulate.  This is actually because I was using this as an opportunity to work on my stringer technique and I find it more challenging to chase it back and forth across the curved surface of the bead than to confine myself to the middle area.  This reawakens my skill set, which is my purpose in doing this project, but doesn't actually precisely replicate the example.  

Duplication of what we are actually looking at is important in making historical beads.  The closer I can make them to the original, the better I am doing at copying the real thing.  There's a very interesting article here that talks about the challenges of trying to duplicate a particular historical bead.  That bead will be the challenge for day 16.  I have not made any of them yet.  Keep checking back.  I'll get there.

Something Different


I have a lot of interests.  I'm not necessarily any good at some of them, but that is no reason not to be interested.  One of the things I enjoy very much is knife throwing.  Only I normally throw spikes instead of knives.  

When I take the dog out to her run so she can relieve herself in the morning, I like to grab the spikes and throw them for a few minutes.  These pictures were taken this morning.


The target is pretty mangled because it sees a lot of use, not only from my spikes, but also from my wife's tomahawks.  When I get the chainsaw out in a couple of weeks, one of the first things I'm going to do is replace this piece of log with a new target round.


My spikes are 11" long and have a square point at the tip.  This is a remarkably aggressive point to put on a throwing spike.


A close-up of the tips.  I forge the points and only have to do minor touch-up with the grinder.  These spikes are heat treated to be tough.  I've broken several commercial throwing knives through lots of use.  These spikes will put up with anything I've done to them so far.

I throw from about 10 feet away and finally stick them more often than not. At least if I hit the target at all.  You'd think that a slice of tree 18" across would be easy to hit from that distance.  And for some people it is...

But why pink?

I discovered years ago that it is far too easy to lose a knife or spike that is black.  You might think a black object would stand out in the grass or the dirt of the hillside behind my target, but it doesn't.  I sometimes spent more time looking for the spikes that missed the target than I did actually throwing them.  Painted them pink and that problem went away.  

I'm not a ninja.  I don't need them to be black.  I just need to find them when I (very often) miss the target and have to go looking.


Day Six - Fancy Eye Beads

Neither red nor black in evidence today!

Today's beads represent a bit of experimentation that isn't immediately obvious.  I used a lighter cobalt blue for the base bead than I used for the blue layer in the stratified eyes.  This is because the white glass makes the thin layer of transparent cobalt blue look much lighter than it looks as a core bead.  If I used the same blue for both, the eyes wouldn't visually match the base bead and past efforts have shown that it looks mismatched.  The irony is that you have to mismatch the glass to make it look matched with this bead!


Also, notice that the two beads up front have slightly different colors in their cores?  That's because the one on the left is wound around a small core of clear glass to try to get a little more transparency and match the core to the eyes a little better.  It works, but is enough of a hassle that it isn't really worth doing.  The clear is much stiffer than the blue.  White is possibly the easiest-flowing glass color I have in my palette at the moment.

Side note:

You may have noticed that I've posted 6 days of beads all on the same day.  That's because I made all of these beads over several days and have only today gotten around to starting a blog to share them with the world.  The days referred to are the days of the original challenge of the 21 day bead boot camp.


Day Five - Eye Beads

As promised, new colors!


White!  Blue!

Eye beads seem to be common in any bead making culture.  For good reason.  If you put a dot of a contrasting color on a seed bead, it is now a spotted bead.  Add another dot on that one and it becomes the pupil of an eye.  They can also be called stratified dots. The Warring States period in China saw the pinnacle of stratified dot beads.  Just do an image search in your favorite search engine and see what was made in Asia 2300 years ago!

Getting the dots centered and keeping the size of dots consistent is a matter of a lot of practice.  I've made quite a few eye beads since I started melting glass 20 years ago.

It is easy to find claims that these are meant to ward off the "evil eye," but I've only ever seen that stated without attribution.  It is common knowledge, but that doesn't make it true.

Regardless of what the beliefs about them may or may not be, eye beads are fun to make and fun to look at.

Day Four - Bicones


A bicone is a bead that has been shaped on a marver (see the last entry) to give it a shape that tapers on both sides, like two cones put together.

I've always liked the shape of bicone beads.  There's something just personally satisfying about them.


And yes, I am aware that so far all of them have been the same two colors.  I do have other colors of glass.  I just like working with red and black.  And I like the striking color combination.  Don't worry, a different color is coming tomorrow.

Day Three - Barrel Beads

Nothing super fancy so far.  Again, simple beads are where the foundation skills happen.  I really appreciate that this 21 day project includes the simple, basic beads.  If you can't get those right, it is almost impossible to expect to get anything else right.

The barrel beads for this project are just seed beads that have been rolled over a flat surface.  This surface is called a marver.  We have marvers made of graphite, real marble, and aluminum.  My favorite is the basic block of aluminum.


The challenge each day is to make 3-6 of each bead.  I think I need to make a few more of these just to get the consistent shape I want.  You can see that a few of these are lopsided and wonky.  My personal temptation is always to dismiss that sort of mistake, saying "this would have been perfectly acceptable back in the day."  Technically true, perhaps.  But it doesn't display the level of skill I intend to achieve with my glass work.

In the future, I may show some of my favorite bead making tools.  It is a hobby that requires remarkably little in the way of start-up equipment.  We've upgraded our own setup in several ways, but it really isn't a very complicated shop setup.

Day Two of the 21 Day Bead Boot Camp 

This is a variation on the seed bead.  Dena Cowlishaw calls them "disk beads" and I can't really argue.  Hers are shaped slightly differently from mine.  We are looking at different historical pictures, I suspect.  There are several places where my own interpretations are going to differ from hers, but I try hard not to stray from the clear historical shapes, colors, and designs.


Here, I have displayed a few of the Day Two beads on the end of our pointed bead reamer.  These are thinner, more disk-like.  And getting them even is a little trickier than it appears.

At first, I didn't really think these should be considered a separate sort of bead.  Then I made a few.  Details make the difference.  Just by changing the proportions, we have a very different bead to make, even if it isn't all that much different to look at.

Real skill is apparent when you can tell that someone is making what he or she intends to make.  Happy accidents are wonderful, but are not really evidence of intentional skill.  My sizes are not perfectly consistent, so I can see that I have work to do in this area.